How to Diagnose and Fix AC Issues: No Cold Air, Strange Noises, Not Turning On, Thermostat Problems, and Running Constantly
Share
Introduction
Air conditioners are essential for maintaining a comfortable indoor environment, especially during the hot summer months. However, like any other appliance, they can experience issues that hinder their performance. Common problems include the AC not blowing cold air, making strange noises, not turning on, thermostat problems, and running constantly. One potential cause of these issues is a faulty compressor capacitor. This blog will guide you through the process of diagnosing a faulty capacitor, identifying the correct capacitor model, and purchasing a replacement from a reliable source.
Tools and Methods for Diagnosing a Faulty Capacitor
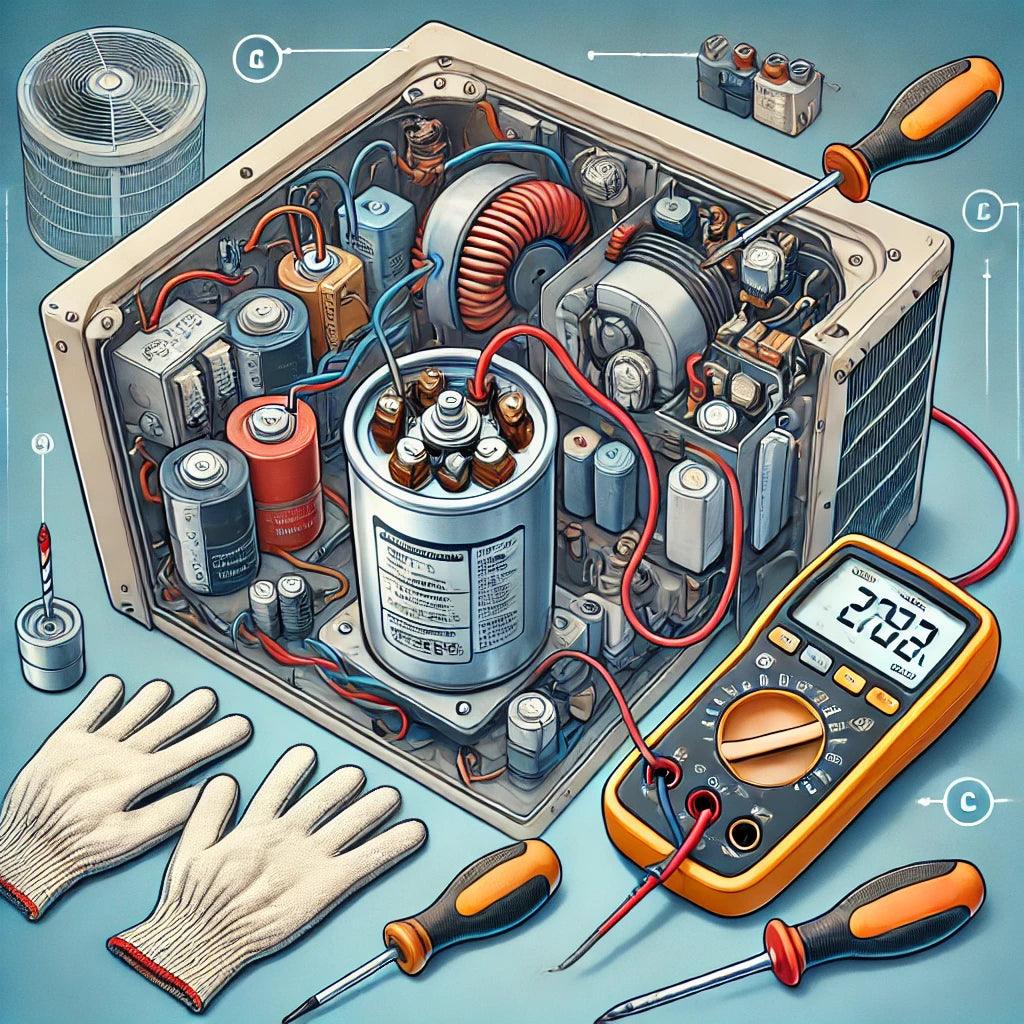
To diagnose a faulty AC compressor capacitor, you will need the following tools:
- Multimeter: A digital or analog multimeter is essential for measuring voltage, resistance, and capacitance.
- Screwdriver: To open the AC unit and access the capacitor.
- Insulated Gloves: For safety purposes when handling electrical components.
- Capacitance Meter: Optional but useful for directly measuring the capacitance of the capacitor.
Steps for Diagnosing a Faulty Capacitor:
- Safety First: Turn off the power to the AC unit at the breaker box to ensure no electrical current flows through the system while you work.
- Access the Capacitor: Use a screwdriver to remove the access panel on the AC unit to locate the capacitor.
- Discharge the Capacitor: Before handling the capacitor, discharge it by placing an insulated screwdriver across its terminals to avoid any residual charge.
- Visual Inspection: Look for signs of damage such as bulging, leaks, or corrosion on the capacitor. These are clear indicators of a faulty capacitor.
-
Test with a Multimeter:
- Set the Multimeter: Set your multimeter to the capacitance setting.
- Disconnect the Capacitor: Remove the wires connected to the capacitor terminals.
- Measure Capacitance: Place the multimeter leads on the capacitor terminals. Compare the reading with the capacitor's rated capacitance value (marked on its body). A reading significantly lower than the rated value indicates a faulty capacitor.
Identifying the Capacitor Model
Once you have determined that the capacitor is faulty, you need to identify its model to purchase a suitable replacement. The necessary information can be found on the capacitor itself, including:
- Capacitance (μF): Measured in microfarads (μF), it indicates the capacitor's storage capacity.
- Voltage Rating (V): The maximum voltage the capacitor can handle, typically ranging from 370V to 440V for AC capacitors.
- Physical Size: The dimensions of the capacitor to ensure it fits in the existing space.
Purchasing the Replacement Capacitor
With the necessary specifications in hand, visit BestDIYGeek to find a suitable replacement. This website offers a wide selection of air conditioning capacitors.
How to Choose the Right Capacitor:
- Match the Capacitance: Ensure the replacement capacitor has the same capacitance rating as the faulty one.
- Voltage Rating: Choose a capacitor with an equal or higher voltage rating than the original.
- Physical Size: Verify that the dimensions of the new capacitor will fit in the existing space in your AC unit.
Conclusion
Diagnosing and replacing a faulty AC compressor capacitor can restore your air conditioner's functionality and efficiency. By following the steps outlined in this guide and using the right tools, you can identify a faulty capacitor and purchase the correct replacement from BestDIYGeek. Regular maintenance and timely replacements of faulty components can prolong the lifespan of your air conditioner and ensure it operates effectively.